I’ve been an iOS developer (professionally) for over six years. There is one constant in every iOS app that I’ve written for someone else. They all communicate with a web service to read and write data from the iOS app/client. Even my personal side project apps are moving from completely isolated on the device to talking to a web service.
If you work on any sort of mobile client that communicates with a web service, you should learn how to use Charles Proxy. I’ve been using this tool for years and find it absolutely indispensable.
This post will give a primer on using Charles with a simple iOS project. I wrote a very simple project that will load the Curated Images from Unsplash. You can grab the source code from GitHub.
All of the setup in this post is for the iOS Simulator. But setting up Charles to talk to other devices (tvOS or real iOS/tvOS devices), is easy enough. I have written a separate guide to setting up Charles Proxy for an Apple TV device, which you can find it here: Setting up Charles Proxy on Apple TV (tvOS).
Please Note: The way I’ve outlined the instructions here is not the only way to do things. Feel free to explore the app on your own.
Also Please Note: I’ve included short YouTube videos showing the steps for the instructions below. Some of the instruction sets can be complicated and the YouTube videos should help out.
Charles Proxy Details
Before we get started, here are some details about Charles Proxy. Directly from the developer’s website:
Charles is an HTTP proxy / HTTP monitor / Reverse Proxy that enables a developer to view all of the HTTP and SSL / HTTPS traffic between their machine and the Internet. This includes requests, responses and the HTTP headers (which contain the cookies and caching information).
Website: http://www.charlesproxy.com
Cost: $50 USD
Free trial? Yes, for 30 days
Charles Proxy Overview
Charles Proxy is an HTTP proxy/monitor application. It allows you to monitor web traffic from a variety of sources, including macOS/iOS/tvOS devices and the iOS/tvOS simulator. This means that you won’t have to write temporary code like this:
print("JSON Response: \(JSON)")
or
NSLog(@"JSON Response: %@", JSON)
Instead, you’ll be able to setup your device/simulator to use Charles Proxy and watch the inbound/outbound HTTP(S) traffic without making a single code change.
Setting up Charles
The steps for configuring Charles to watch iOS Simulator traffic have gotten so much easier over the years. Follow these steps to get started:
- Launch Charles Proxy
- Make sure that you have run the target iOS Simulator at least once.
- Quit the iOS Simulator
- Open Charles and navigate to Help -> SSL Proxying -> Install Charles Root Certificate in iOS Simulators
If your app is talking to a HTTPS website (as it should be), there may be a few extra steps you need to do in order to actually see the data. By default, the HTTPS/SSL response from a web service may look like this:
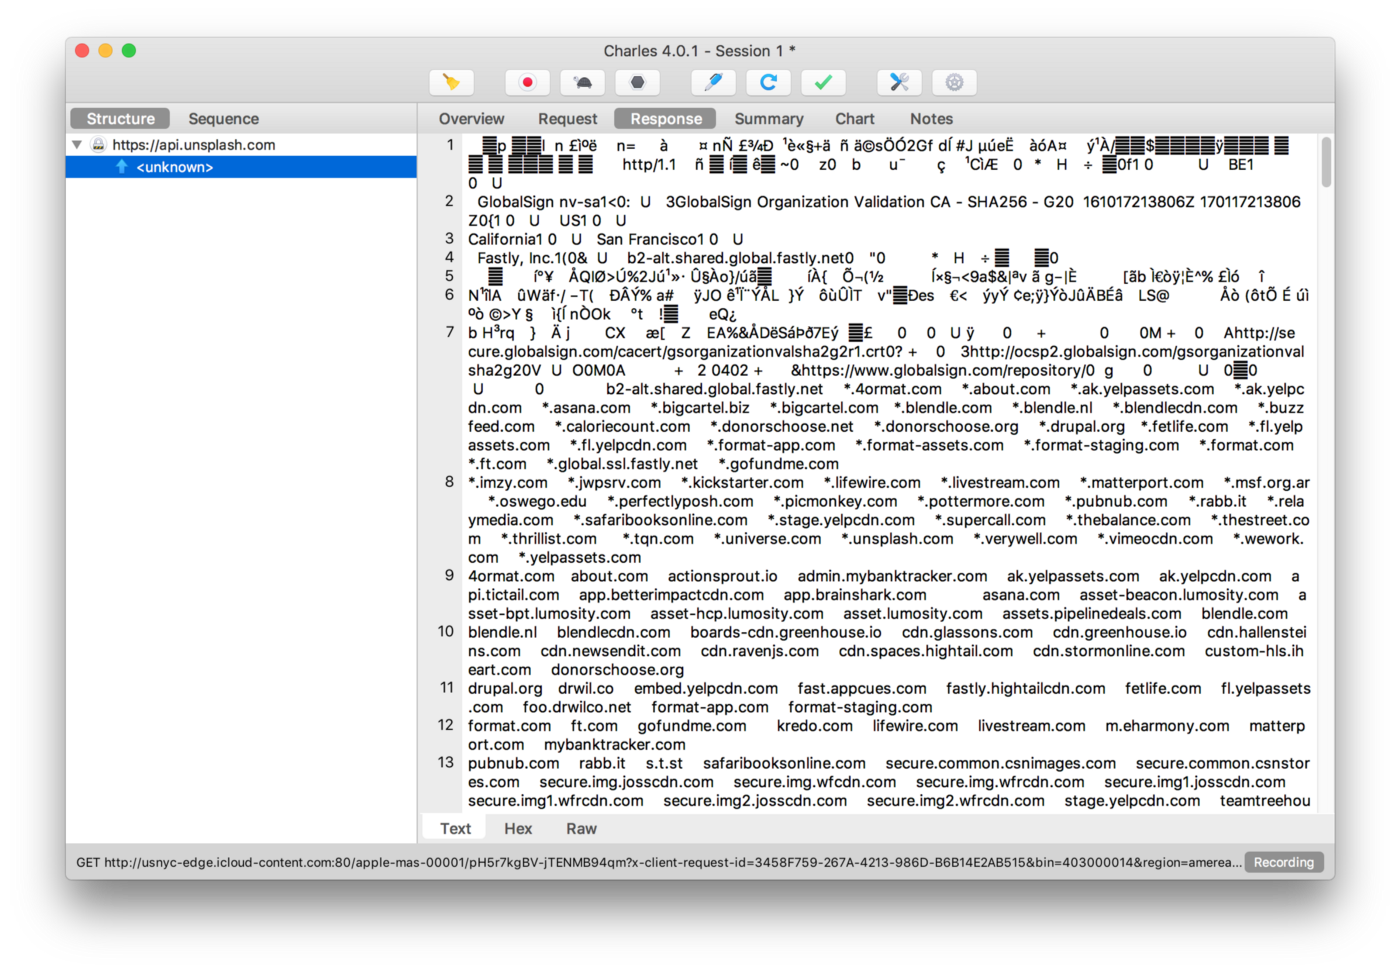
In order to unscramble that mess, you need to enable SSL Proxying for the domain. Follow these steps to enable SSL Proxying for the Unsplash API domain:
- Open Charles and navigate to Proxy -> SSL Proxying Settings
- Click on the SSL Proxying tab.
- Make sure Enable SSL Proxying is enabled.
- Click the Add button at the bottom.
- Enter
api.unsplash.cominto the Host field and click OK.
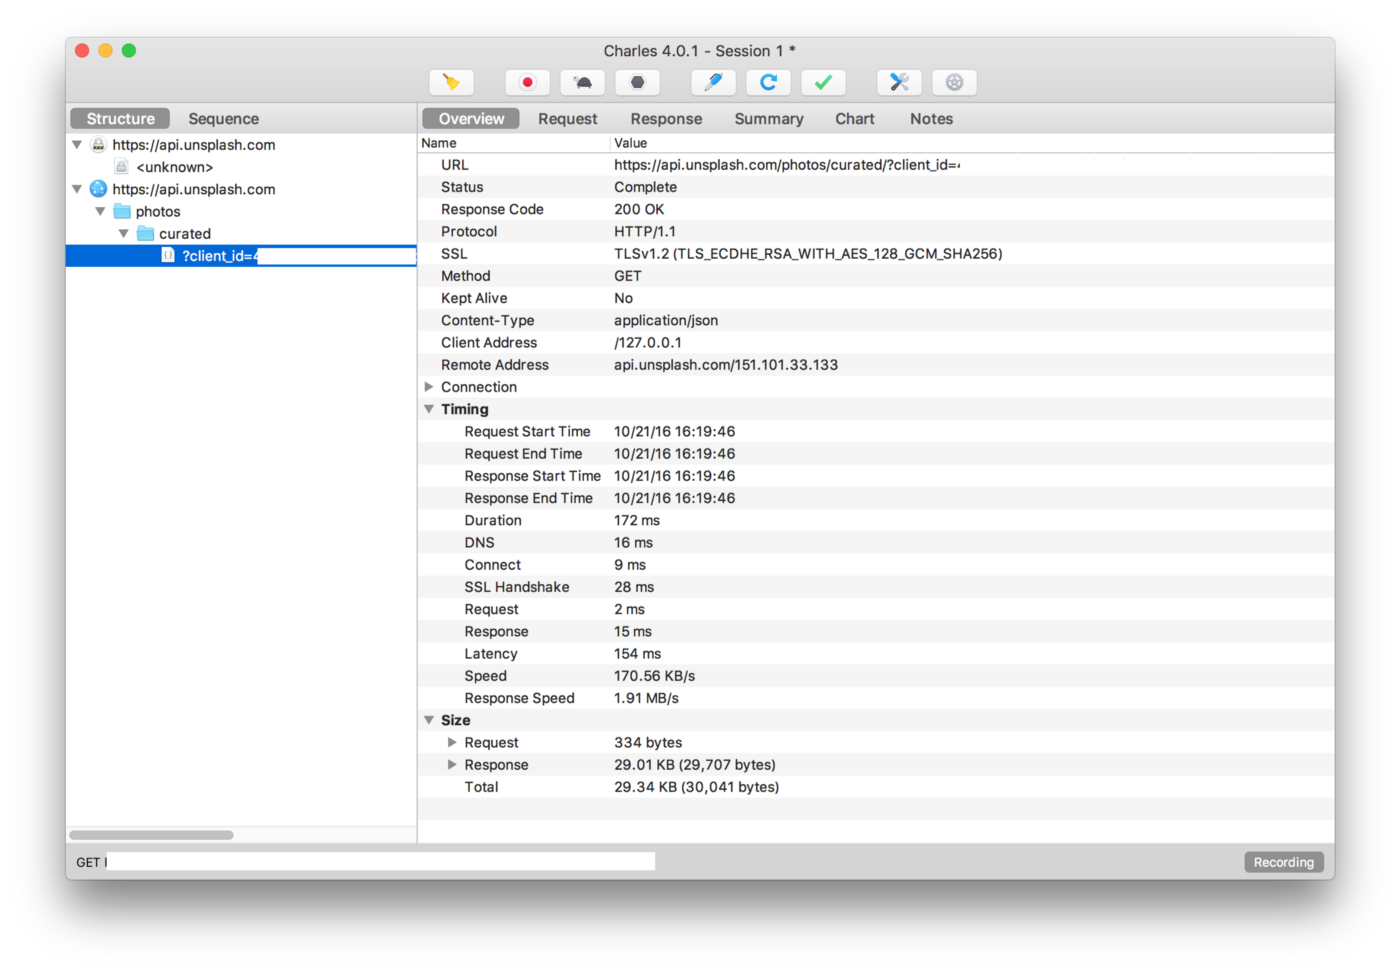
Thats it. When you restart your app, Charles should start capturing your web traffic. The HTTP response will look more like this:
If you’d like to know how to install the SSL Certificates for other devices, the Charles website has instructions on how to do this.
You can use Charles as it is, or you can customize things. I don’t like having all of my web traffic recorded, so I limit what Charles records on my behalf. In order to do this, follow these steps:
- Open Charles and navigate to Proxy -> Recording Settings
- Click on the Include Tab tab.
- Click the Add button at the bottom.
- Paste
http://api.unsplash.com/*into the Host field and press the Tab key on your keyboard. All off the fields will be populated here. - Click OK.
Once you start adding entries here, Charles will not record traffic to other domains. This really helps in keeping your traffic logs nice and clean. It really helps when you submit defects/tickets to other people (say the web service team) with a nice clean Charles log showing what happened.
Watching Traffic
If you’ve made it this far, you’ve already seen the first major feature of Charles. You can view web traffic. This feature alone is worth purchasing a Charles license. Being able to see live data from a web service during development, testing and (even the) production phases is invaluable.
During the development phase, it’s great to see the data you are getting back in your app. Sure, you can add some debug print lines (shown above), but recompiling an app just to add logging statements you’ll need to remove later can be a pain.
Not only can you view traffic, but you can save the Charles session (File -> Save Session) for later inspection. In my day job, we have often asked QA for Charles logs along with defects that are created. This helps us know if the API (web service) is returning bad data or if the app is showing the wrong thing.
This technique of watching traffic and saving it later works for production issues too. If a single user (that you have physical access to) is having an issue, you can (temporarily) install the Charles SSL Cert and watch their traffic through Charles. This particular user may have something odd in their setup or account that’s causing something funky going on.
Please Note: This last technique where you view a customer’s data should be used sparingly. We never used it with external, paying customers. We always used this technique with internal customers. You should have the user’s permission before doing so. Having access to your customers’ logs can mean you may have access to their login information. We always have a user log into the system before we start tracking their logs. Just be careful here.
Mapping
Ok. So, I can watch traffic with Charles. What else does the app do?
One of the major benefits of using Charles is to map responses somewhere else. You can map responses to either a local file, or to a remote server. In this blog post, we’ll demonstrate mapping an API call in my Unsplashed demo app to a remote service that always returns a 500 HTTP Status code.
Using this technique is perfect for testing failures from a remote API that your app depends on without changing code to simulate the error or actually taking down the service. You can test this on an app build that is ready to ship without having to make changes. The thought of taking down a service so you can test error conditions is terrible. Don’t do that.
Remote mapping to 500 service
Great. You’re on board and want to try out this mapping thing. In the GitHub repo, there is a directory called “Charles Rules” that contains the first rule we’ll be importing into Charles. You don’t need to import this rule, you can create it yourself, but I’ve added it for simplicity.
Here’s how you import the existing rule from the GitHub Repo:
- Open Charles and navigate to Tools -> Map Remote…
- Click on the Enable Map Remote checkbox to enable it.
- Click the Import button at the bottom.
- Navigate to the Charles Rules/500HttpStatusRemote.xml file and click Open.
- Click OK.
Or if you’d rather create the rule yourself, follow these steps:
- Open Charles and navigate to Tools -> Map Remote…
- Click on the Enable Map Remote checkbox to enable it.
- Click the Add button near the bottom.
- Paste
https://api.unsplashed.com/photos/curated/?client_id=*into the Map From Host field and press the Tab key on your keyboard. All of the fields will be populated here. - Paste
http://httpstat.us/500into the Map To Host field and press the Tab key on your keyboard. All off the fields will be populated here. - Click OK.
- Click OK.
Now, if you relaunch the app, you should be presented with an error message and see that there is now traffic being routed to http://httpstat.us/500.
The service http://httpstat.us can serve up all of the HTTP status codes including 418 I'm a teapot. You can use this technique to test all sorts of error conditions. The sample project responds the same way based on any non-200 OK response, but your app may need to respond differently based on various HTTP status codes.
When you look at the Charles traffic, you will no longer see the original URL being mapped. This also means that you’ll need to listen for the mapped URL in addition to the original one. Please read above for notes on adding additional URLs.
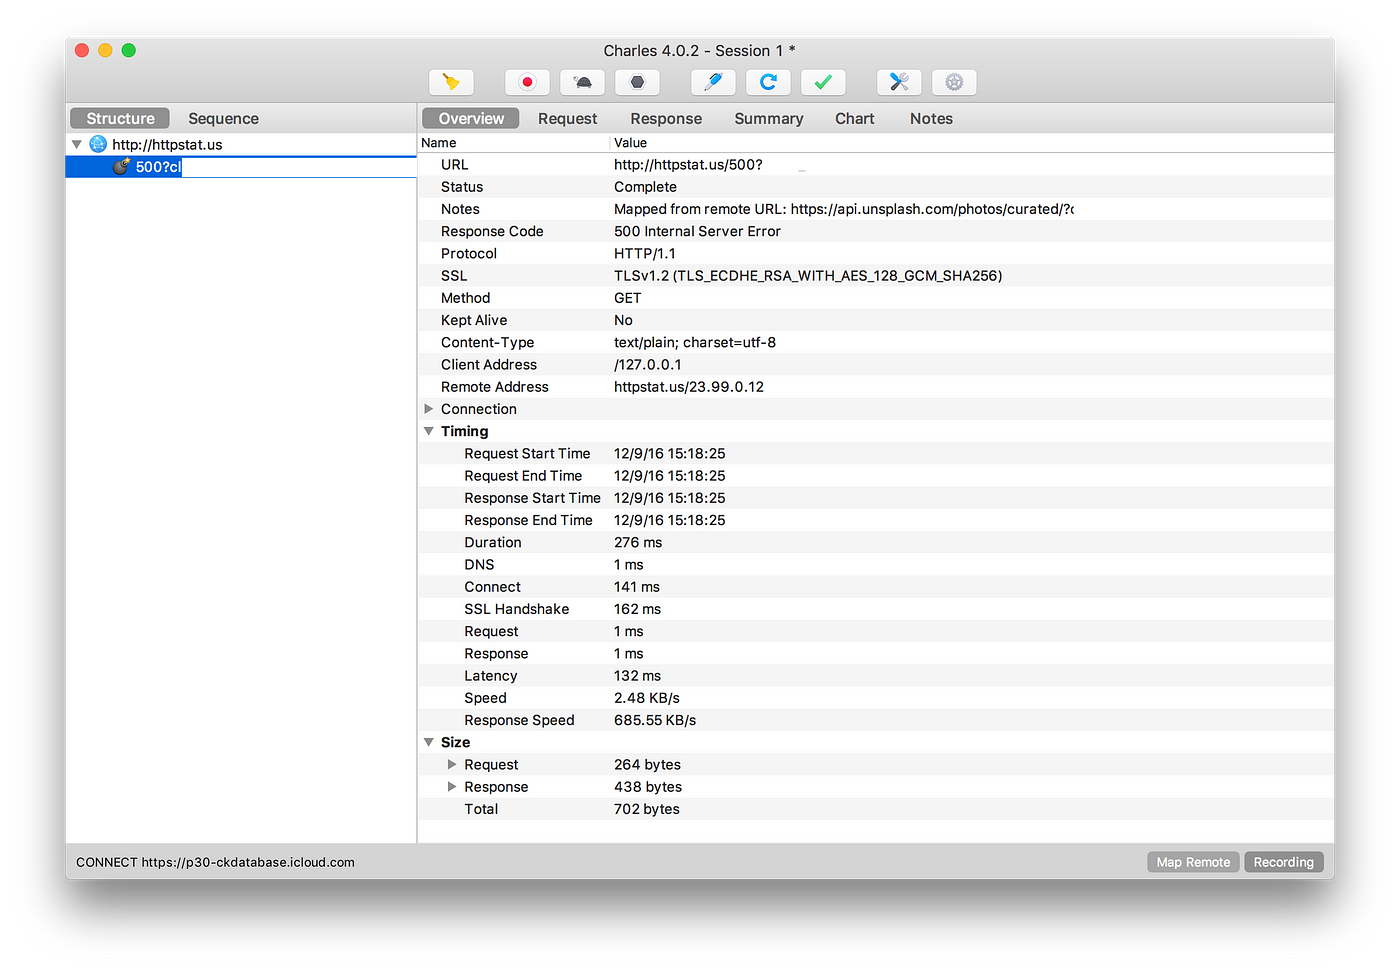
If you look at the response overview, you’ll notice that Charles has included a note about the response:
Mapped from remote URL: https://api.unsplash.com/photos/curated/?…
This note is important so that you know what’s happening with your messages. It’s also helpful for debugging in the next section.
Rewriting Traffic
Mapping traffic can be a really powerful tool. But Charles can do more. You can also rewrite responses from an API. Why would you want to do this? I can think of two very specific examples:
First, it’s useful when you want to return a known response on every call. This could be useful for testing with an empty result set, or testing with a funky response. Either way, you can always rewrite the response so that it includes exactly the data you’re looking for.
Second, you can handle APIs that do a bad job of error handling. I’ve worked with a few APIs that would return a 200 OK response for an error, but include JSON or XML that would include an error message. I know, we all make mistakes. Services like http://httpstat.us can’t handle this. Rewriting traffic will allow you handle any case you need to.
Rewriting
I’ve included a few example rewrite rules in the Charles Rules folder in the GitHub repo. You can import these using the following steps.
- Open Charles and navigate to Tools -> Rewrite…
- Click on the Enable Rewrite checkbox to enable it.
- Click the Import button at the bottom.
- Navigate to the Charles Rules/422RewriteError.xml file and click Open.
Creating a rewrite rule from scratch is not always easy. They can be tricky to setup and it’s easy to forget steps.
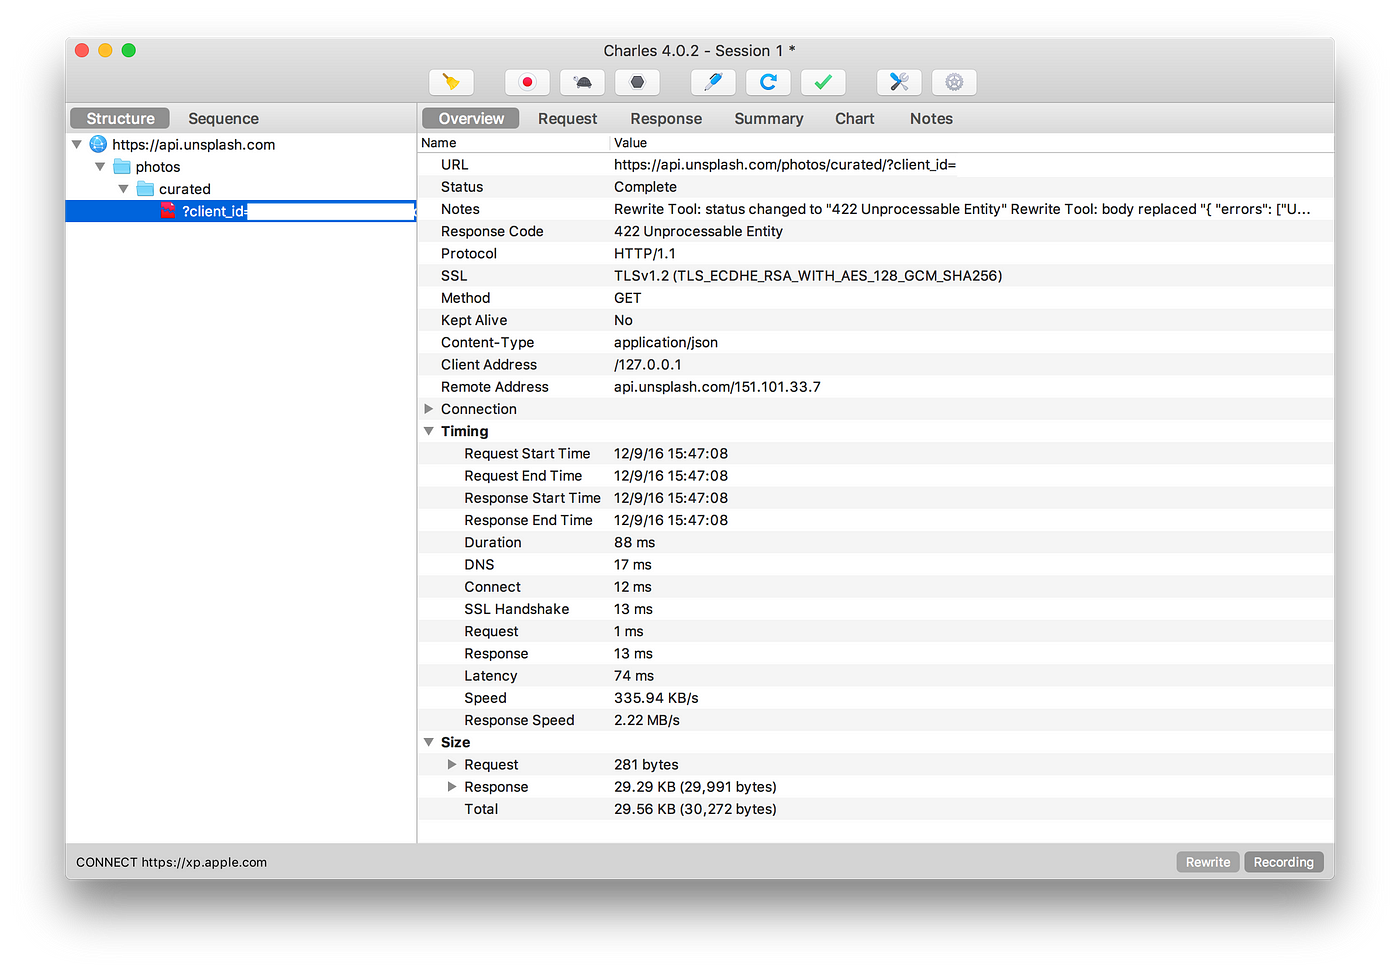
This example will return a HTTP status code of 422 (Unprocessable Entity)along with an array of error messages. This is taken directly from the Unsplash API Error Messages docs. If I were to take this example app further, I would add code to handle these error responses.
There are a lot of steps here. Please bear with me. Or watch the video below.
- Open Charles and navigate to Tools -> Map Remote…
- Click on the Enable Rewrite checkbox to enable it.
- Click the Add button near the bottom.
- Type a name into the Name field.
- Click the Add button under the Location section
- Paste
https://api.unsplash.com/photos/curated/?client_id=*into the Host field and press the Tab key on your keyboard. All off the fields will be populated here. - Click OK
- Click the Add button under the bottom Type/Rules section
- Change the Type dropdown value to Body
- Click the Request checkbox to that it is disabled
- Click the Response checkbox to that it is enabled
- Paste
{ "errors": ["Username is missing", "Password cannot be blank"] }into the Value field in the Replace section at the bottom. - Click OK
- Click the Add button under the bottom Type/Rules section
- Change the Type dropdown value to Response Status
- Paste
422 Unprocessable Entityinto the Value field in the Replace section at the bottom. - Click OK
- Click Apply
- Click OK
When creating these rewrite rules, it’s valuable to make sure the responses are either valid XML or JSON before using them. It can be painful to edit parts of responses in the Charles rewrite modal view. I’ll usually verify that the JSON is valid before pasting it in there. In the past, I’ve spent a lot of time trying to debug my rules only to find out the response JSON is invalid.
Conclusion
I hope this primer has been useful on getting started with Charles Proxy as a development tool. There are many more features to Charles Proxy that I haven’t even touched on.
Charles Proxy is invaluable to me as a client developer. There are too many features to cover in this article. In fact, I’m still discovering new features that I hope to use in the future.
As I continue to grow and learn more, I may cover new topics in a subsequent post, if there’s enough interest.